
Book: 5.0, 5.1, 5.2, 6.0, 6.1, 6.2, 7.0, 7.1, 7.2, 8.0, 8.1, 8.2, 9.0, 9.1, 9.2, 10.0, 10.1, 10.2, 11.0, 11.1, 11.2
Chapter 2. Installing dCache
If you have never run dCache before then this chapter will get you started as quickly as possible, with some useful features available for you to explore.
In fact, this chapter does much more than give you a bare-bones dCache deployment. It contains a number of steps, each building from the previous steps, that with give you a multi-node dCache cluster that supports multiple network protocols and multiple authentication schemes. The result will be both scalable and fault-tolerant, using dCache’s highly available options.
By doing this step-by-step, you have the opportunity to learn more about how dCache works and explore some of the details of dCache configuration and administration without being overwhelmed. As far as possible, you can simply copy the commands and end up with a working dCache. We’ve included some example commands that perform some basic tests, so you can have some confidence that everything is OK so far, before moving on to the next step.
Please note that, although this chapter will provide you with a working dCache instance, you should not blindly use this chapter as a recipe for a production instance. There are many ways to configure dCache. The optimal choice depends on which hardware you wish to use and how dCache’s users will interact with the system. So, we cannot give a simple, single recipe that will provide the optimal solution in all cases.
Prerequisites
As this chapter encompasses an expanding deployment, there is a minimum requirement to complete the first step, and an expanded list of requirements to finish all the steps and reach the end of this chapter.
To make this chapter as precise and accurate as possible, we decided to focus on a single version of a Linux distribution: CentOS v7. dCache will work fine with other distributions (for example, Debian and Ubuntu), but the instructions and responses may be slightly different.
The minimum requirement is a single computer running the latest CentOS-7 Linux distribution with the httpd-tools package installed. The general system requirements are listed is the respective Preface section Minimum System Requirements.
This chapter also describes how to get a server-side certificate from the Let’s Encrypt service. Obtaining a Let’s Encrypt certificate requires that there is external access to port 80 on the machine. If you skip this step (or obtain a server certificate by some other means) then you will not require this external access.
Step 1: building a basic dCache deployment
In this first step, we will deploy dCache in a minimal configuration, just sufficient to allow data to be written and read back using the HTTP/WebDAV protocol.
Installing dCache
All dCache packages are available directly from our website’s dCache releases page, under the Downloads section.
rpm -ivh https://www.dcache.org/downloads/1.9/repo/7.1/dcache-7.1.32-1.noarch.rpm
|Retrieving https://www.dcache.org/downloads/1.9/repo/7.1/dcache-7.1.32-1.noarch.rpm
|Preparing...                          ################################# [100%]
|Updating / installing...
|   1:dcache-7.1.32-1                   ################################# [100%]
Installing prerequisite packages
First, install OpenJDK and httpd-tools packages.
yum install java-11-openjdk-headless httpd-tools
Installing PostgreSQL
In general, the database may be deployed on the same node as dCache or on some dedicated machine with db-specific hardware. The decision involves trade-offs beyond the scope of this chapter; however, to keep this chapter simple, we are assuming the database will run on the same machine as the dCache services that use it.
Please remember that, wherever you choose to deploy the database, it must be tuned for optimal performance for the available hardware. Without doing this, you will see poor performance as PostgreSQL typically experiences very poor performance with its default configuration. Tuning a PostgreSQL server is outside the scope of this chapter.
First we install PostgreSQL’s “Building Project” yum repository:
rpm -Uvh https://download.postgresql.org/pub/repos/yum/reporpms/EL-7-x86_64/pgdg-redhat-repo-latest.noarch.rpm
|Retrieving https://download.postgresql.org/pub/repos/yum/reporpms/EL-7-x86_64/pgdg-redhat-repo-latest.noarch.rpm
|warning: /var/tmp/rpm-tmp.bsZtDm: Header V4 DSA/SHA1 Signature, key ID 442df0f8: NOKEY
|Preparing...                          ################################# [100%]
|Updating / installing...
|   1:pgdg-redhat-repo-42.0-4          ################################# [100%]
Then, install the server package for PostgreSQL. The minimal supported PostgreSQL version is 9.5. In general, we recommend using the latest version and upgrading your PostgreSQL version as new versions becomes available. The example below uses PostgreSQL v10.
yum install postgresql10-server
|Loaded plugins: fastestmirror
|Loading mirror speeds from cached hostfile
| * base: ftp.rrzn.uni-hannover.de
| * extras: ftp.rrzn.uni-hannover.de
| * updates: ftp.rrzn.uni-hannover.de
|Resolving Dependencies
|--> Running transaction check
|---> Package postgresql10-server.x86_64 0:10.9-1PGDG.rhel7 will be installed
|--> Processing Dependency: postgresql10-libs(x86-64) = 10.9-1PGDG.rhel7 for package: postgresql10-server-10.9-1PGDG.rhel7.x86_64
|--> Processing Dependency: postgresql10(x86-64) = 10.9-1PGDG.rhel7 for package: postgresql10-server-10.9-1PGDG.rhel7.x86_64
|--> Processing Dependency: libpq.so.5()(64bit) for package: postgresql10-server-10.9-1PGDG.rhel7.x86_64
|--> Processing Dependency: libicuuc.so.50()(64bit) for package: postgresql10-server-10.9-1PGDG.rhel7.x86_64
|--> Processing Dependency: libicui18n.so.50()(64bit) for package: postgresql10-server-10.9-1PGDG.rhel7.x86_64
|--> Running transaction check
|---> Package libicu.x86_64 0:50.1.2-17.el7 will be installed
|---> Package postgresql10.x86_64 0:10.9-1PGDG.rhel7 will be installed
|---> Package postgresql10-libs.x86_64 0:10.9-1PGDG.rhel7 will be installed
|--> Finished Dependency Resolution
|
|Dependencies Resolved
|
|============================================================================================
| Package                      Arch           Version                  Repository       Size
|============================================================================================
|Installing:
| postgresql10-server          x86_64         10.9-1PGDG.rhel7         pgdg10           4.5 M
|Installing for dependencies:
| libicu                       x86_64         50.1.2-17.el7            base             6.9 M
| postgresql10                 x86_64         10.9-1PGDG.rhel7         pgdg10           1.6 M
| postgresql10-libs            x86_64         10.9-1PGDG.rhel7         pgdg10           355 k
|
|Transaction Summary
|============================================================================================
|Install  1 Package (+3 Dependent packages)
|
|Total download size: 13 M
|Installed size: 52 M
|Is this ok [y/d/N]: y
|Downloading packages:
|warning: /var/cache/yum/x86_64/7/base/packages/libicu-50.1.2-17.el7.x86_64.rpm: Header V3 RSA/SHA256 Signature, key ID f4a80eb5: NOKEYB  --:--:-- ETA
|Public key for libicu-50.1.2-17.el7.x86_64.rpm is not installed
|(1/4): libicu-50.1.2-17.el7.x86_64.rpm                               | 6.9 MB  00:00:00
|warning: /var/cache/yum/x86_64/7/pgdg10/packages/postgresql10-libs-10.9-1PGDG.rhel7.x86_64.rpm: Header V4 DSA/SHA1 Signature, key ID 442df0f8: NOKEYA
|Public key for postgresql10-libs-10.9-1PGDG.rhel7.x86_64.rpm is not installed
|(2/4): postgresql10-libs-10.9-1PGDG.rhel7.x86_64.rpm                 | 355 kB  00:00:01
|(3/4): postgresql10-10.9-1PGDG.rhel7.x86_64.rpm                      | 1.6 MB  00:00:01
|(4/4): postgresql10-server-10.9-1PGDG.rhel7.x86_64.rpm               | 4.5 MB  00:00:00
|--------------------------------------------------------------------------------------------
|Total                                                       7.8 MB/s |  13 MB  00:00:01
|Retrieving key from file:///etc/pki/rpm-gpg/RPM-GPG-KEY-PGDG
|Importing GPG key 0x442DF0F8:
| Userid     : "PostgreSQL RPM Building Project <pgsqlrpms-hackers@pgfoundry.org>"
| Fingerprint: 68c9 e2b9 1a37 d136 fe74 d176 1f16 d2e1 442d f0f8
| Package    : pgdg-redhat-repo-42.0-4.noarch (installed)
| From       : /etc/pki/rpm-gpg/RPM-GPG-KEY-PGDG
|Is this ok [y/N]: y
|Retrieving key from file:///etc/pki/rpm-gpg/RPM-GPG-KEY-CentOS-7
|Importing GPG key 0xF4A80EB5:
| Userid     : "CentOS-7 Key (CentOS 7 Official Signing Key) <security@centos.org>"
| Fingerprint: 6341 ab27 53d7 8a78 a7c2 7bb1 24c6 a8a7 f4a8 0eb5
| Package    : centos-release-7-5.1804.4.el7.centos.x86_64 (installed)
| From       : /etc/pki/rpm-gpg/RPM-GPG-KEY-CentOS-7
|Is this ok [y/N]: y
|Running transaction check
|Running transaction test
|Transaction test succeeded
|Running transaction
|  Installing : libicu-50.1.2-17.el7.x86_64                                               1/4
|  Installing : postgresql10-libs-10.9-1PGDG.rhel7.x86_64                                 2/4
|  Installing : postgresql10-10.9-1PGDG.rhel7.x86_64                                      3/4
|  Installing : postgresql10-server-10.9-1PGDG.rhel7.x86_64                               4/4
|  Verifying  : postgresql10-10.9-1PGDG.rhel7.x86_64                                      1/4
|  Verifying  : postgresql10-server-10.9-1PGDG.rhel7.x86_64                               2/4
|  Verifying  : postgresql10-libs-10.9-1PGDG.rhel7.x86_64                                 3/4
|  Verifying  : libicu-50.1.2-17.el7.x86_64                                               4/4
|
|Installed:
|  postgresql10-server.x86_64 0:10.9-1PGDG.rhel7
|
|Dependency Installed:
|  libicu.x86_64 0:50.1.2-17.el7             postgresql10.x86_64 0:10.9-1PGDG.rhel7
|  postgresql10-libs.x86_64 0:10.9-1PGDG.rhel7
|
|Complete!
With the database packages installed, we can initialise the database the service. Note that we do not start the database at this point, as we will make some tweaks to the configuration.
/usr/pgsql-10/bin/postgresql-10-setup initdb
|Initializing database ... OK
Perhaps the simplest configuration is to allow password-less access to the database. This install chapter assumes this to be the case.
NOTE
Please note it is also possible to run dCache with all PostgreSQL accounts requiring passwords. See the section called “Configuring Access to PostgreSQL” for more advice on the configuration of PostgreSQL.
To allow local users to access PostgreSQL without requiring a password, make sure the following three lines are the only uncommented lines in the file /var/lib/pgsql/10/data/pg_hba.conf
local   all             all                                     trust
host    all             all             127.0.0.1/32            trust
host    all             all             ::1/128                 trust
Once this is done, we can configure the system to automatically start PostgreSQL on startup, and then manually start the database:
systemctl enable postgresql-10
|Created symlink from /etc/systemd/system/multi-user.target.wants/postgresql-10.service to /usr/lib/systemd/system/postgresql-10.service.
systemctl start postgresql-10
We can request the current status of PostgreSQL just to verify quickly that it is working.
systemctl status postgresql-10
|● postgresql-10.service - PostgreSQL 10 database server
|   Loaded: loaded (/usr/lib/systemd/system/postgresql-10.service; enabled; vendor preset: disabled)
|   Active: active (running) since Fri 2019-07-19 14:38:31 UTC; 1s ago
|     Docs: https://www.postgresql.org/docs/10/static/
|  Process: 17395 ExecStartPre=/usr/pgsql-10/bin/postgresql-10-check-db-dir ${PGDATA} (code=exited, status=0/SUCCESS)
| Main PID: 17400 (postmaster)
|   CGroup: /system.slice/postgresql-10.service
|           ├─17400 /usr/pgsql-10/bin/postmaster -D /var/lib/pgsql/10/data/
|           ├─17402 postgres: logger process
|           ├─17404 postgres: checkpointer process
|           ├─17405 postgres: writer process
|           ├─17406 postgres: wal writer process
|           ├─17407 postgres: autovacuum launcher process
|           ├─17408 postgres: stats collector process
|           └─17409 postgres: bgworker: logical replication launcher
|
|Jul 19 14:38:31 dcache.example.org systemd[1]: Starting PostgreSQL 10 database server...
|Jul 19 14:38:31 dcache.example.org postmaster[17400]: 2019-07-19 14:38:31.415 UTC [17400] LOG:  listening on IPv6 address "::1", port 5432
|Jul 19 14:38:31 dcache.example.org postmaster[17400]: 2019-07-19 14:38:31.415 UTC [17400] LOG:  listening on IPv4 address "127.0.0...t 5432
|Jul 19 14:38:31 dcache.example.org postmaster[17400]: 2019-07-19 14:38:31.427 UTC [17400] LOG:  listening on Unix socket "/var/run....5432"
|Jul 19 14:38:31 dcache.example.org postmaster[17400]: 2019-07-19 14:38:31.450 UTC [17400] LOG:  listening on Unix socket "/tmp/.s.....5432"
|Jul 19 14:38:31 dcache.example.org postmaster[17400]: 2019-07-19 14:38:31.477 UTC [17400] LOG:  redirecting log output to logging ...rocess
|Jul 19 14:38:31 dcache.example.org postmaster[17400]: 2019-07-19 14:38:31.477 UTC [17400] HINT:  Future log output will appear in ..."log".
|Jul 19 14:38:31 dcache.example.org systemd[1]: Started PostgreSQL 10 database server.
|Hint: Some lines were ellipsized, use -l to show in full.
Creating PostgreSQL users and databases
dCache will manage the database schema, creating and updating the database tables, indexes etc as necessary. However, dCache does not create the databases. That is a manual process, typically done only once.
Since this is a new PostgreSQL deployment, we must first create the database users. For this setup, we will create a single database user: dcache.
createuser -U postgres --no-superuser --no-createrole --createdb --no-password dcache
Now we can create the databases, using the correct database user to ensure correct database ownership. At this stage, we need only one database: chimera. This database holds dCache’s namespace.
createdb -U dcache chimera
Creating a minimal dCache configuration
The main configuration for dCache is the layout file. By default, the layout file is located in the /etc/dcache/layouts directory, with a filename formed by concatenating this machine’s hostname with .conf. For example, if the machine is called dcache.example.org then the default layout file path is /etc/dcache/layouts/dcache.example.org.conf.
It is normally a good idea to follow this naming scheme, as it allows different hosts within the dCache cluster to share the same configuration directory.
However, to make it easier to copy-and-paste examples from this document, we will update dCache so that the layout file is /etc/dcache/layouts/mylayout.conf, irrespective of the machine’s hostname. To do this, update the file /etc/dcache/dcache.conf, appending the following line:
dcache.layout = mylayout
Now, create the file /etc/dcache/layouts/mylayout.conf with the following contents:
dcache.enable.space-reservation = false

[dCacheDomain]
 dcache.broker.scheme = none
[dCacheDomain/zookeeper]
[dCacheDomain/admin]
[dCacheDomain/pnfsmanager]
 pnfsmanager.default-retention-policy = REPLICA
 pnfsmanager.default-access-latency = ONLINE

[dCacheDomain/cleaner]
[dCacheDomain/poolmanager]
[dCacheDomain/billing]
[dCacheDomain/gplazma]
[dCacheDomain/webdav]
 webdav.authn.basic = true
This tells dCache to run a single domain (Java Virtual Machine process) called dCacheDomain. Within that single process, dCache will start the pnfsmanager, cleaner, poolmanager, billing, gplazma and webdav services.
As the line dcache.enable.space-reservation = false appears before the first domain declaration ([dCacheDomain]), it applies to everything in this file.
As the line dcache.broker.scheme = none appears after the dCacheDomain domain declaration, but before the first service ([dCacheDomain/zookeeper]) it applies to the domain and all services.
As the line pnfsmanager.default-retention-policy = REPLICA appears after a service declaration, it applies only to that service.
What are these configuration lines doing?
dcache.enable.space-reservation = false tells dCache that space reservation is not supported on this dCache cluster: when uploading data, dCache shouldn’t first allocate sufficient capacity for that file.
dcache.broker.scheme = none tells the domain that it is running stand-alone, and should not attempt to contact other domains.
pnfsmanager.default-retention-policy = REPLICA and pnfsmanager.default-access-latency = ONLINE tell dCache that files written without any explicit instructions should stay on disk and not be written to any tertiary storage.
webdav.authn.basic = true tells the WebDAV endpoint to allow HTTP BASIC authentication over an unencrypted connection. This is insecure, so disabled by default.
We can verify this by asking dCache which services should be running in the different domains on this host. Currently there is a single domain (dCacheDomain) which will host all eight configured services:
dcache services
|DOMAIN       SERVICE     CELL          PROXIED REPLICABLE
|dCacheDomain zookeeper   zookeeper     -       No
|dCacheDomain pnfsmanager PnfsManager   -       Yes
|dCacheDomain cleaner     cleaner       -       No
|dCacheDomain poolmanager PoolManager   -       Yes
|dCacheDomain billing     billing       -       Yes
|dCacheDomain gplazma     gPlazma       -       Yes
|dCacheDomain webdav      WebDAV-dcache No      No
The output includes a line for each service running on this machine. The columns have the following meaning:
- DOMAIN
- The domain that hosts this service. This value is taken from the service declaration line in the layout file like [DOMAIN/SERVICE].
- SERVICE
- The type of service. This value is taken from the the service declaration line in the layout file, like [DOMAIN/SERVICE].
- CELL
- The name for this service instance. Each service has a default cell name, but cell names must be unique within the domain. So, if a domain hosts multiple services of the same type then the cell name must be configured.
- PROXIED
- Whether the service accepts file data itself, instead of redirecting the client to transfer the data directly with a pool.
- REPLICABLE
- Whether the service may have multiple instances in a high-available (HA) deployment with load balanced over those instances.
A common operation is to ask what is the current status of all domains running on this machine:
dcache status
|DOMAIN       STATUS  PID USER   LOG
|dCacheDomain stopped     dcache /var/log/dcache/dCacheDomain.log
In the output there is a line for each domain configured to run on this machine, with the columns have the following meanings:
- DOMAIN
- The name of the domain being described.
- STATUS
- The high-level status of this domain. The value is one of stopped, running and restarting. The running status also describes for how long the domain has been running. If restarting then the domain has died and dCache is waiting a short period before automatically restarting it.
- PID
- The process ID for this domain's JVM process.
- USER
- The (Linux) user under which the JVM will run. If dCache is started by the root user then the dcache script will switch user before starting the Java Virtual Machine process.
- LOG
- The principle log file for this domain.
Note that the USER column shows dcache. It’s generally accepted that services should run as some non-root account, to limit the damage from a compromised service. By default, dCache uses the dcache user, and the RPM package ensures this user exists.
We can also query information about how dCache will use the database or servers:
dcache database ls
|DOMAIN       CELL        DATABASE HOST      USER   MIN- MAX-CONNS MANAGEABLE AUTO
|dCacheDomain PnfsManager chimera  localhost dcache      30        Yes        Yes
|dCacheDomain cleaner     chimera  localhost dcache      10        No         No
|TOTAL                                              0    40
The output shows a line for each service that accesses a database. The columns have the following meaning:
- DOMAIN
- The domain being described.
- CELL
- The name for this service instance.
- DATABASE
- The name of the database.
- HOST
- The host that runs the database.
- MIN- & MAX-CONNS
- The minimum and maximum number of concurrent database connections dedicated for this cell. If MIN is empty then there is no lower limit: when idle for an extended period, the cell will close all database connections.
- MANAGEABLE
- The `MANAGEABLE` column shows whether the service can (in principle) manage this database. This value is not configurable.
- AUTO
- The `AUTO` option describes how dCache should react if it detects the database requires a schema update. If set to `Yes` then dCache will automatically apply any outstanding schema changes on start-up. If set to `No` and there are outstanding schema changes then dCache will list them and immediately shutdown. This behaviour is configurable, although it depends on the MANAGEABLE field.
In our case, dCacheDomain has two services that require access to a database: PnfsManager and cleaner. Both services access the chimera database on the local machine (localhost) authenticating as database-user dcache.
By default, the PnfsManager service will manage the chimera database, updating the schema as needed. The cleaner service will simply fail to start if the database schema is not up-to-date. Therefore, it is important that PnfsManager is started before cleaner (PnfsManager appears first in the layout file) or to use manual database updates.
We will run the database operations manually, to exercise the manual database update process. Starting dCache without manually updating the database will trigger services (like PnfsManager) to apply any pending database maintenance when starting up.
To manually update the database schema, run the command dcache database update. When run the first time, this command generates copious output. In this example below, almost all of that output is omitted.
dcache database update
|PnfsManager@dCacheDomain:
|INFO  - Successfully acquired change log lock
|INFO  - Creating database history table with name: public.databasechangelog
|INFO  - Reading from public.databasechangelog
|INFO  - org/dcache/chimera/changelog/changelog-master.xml: org/dcache/chimera/changelog/changeset-1.8.0.xml::1::tigran: Table t_dirs created
|[...]
|INFO  - org/dcache/chimera/changelog/changelog-master.xml: org/dcache/chimera/changelog/changeset-5.2.xml::27::tigran: Stored procedure created
|INFO  - org/dcache/chimera/changelog/changelog-master.xml: org/dcache/chimera/changelog/changeset-5.2.xml::27::tigran: ChangeSet org/dcache/chimera/changelog/changeset-5.2.xml::27::tigran ran successfully in 8ms
|INFO  - Successfully released change log lock
|Liquibase Update Successful
Configuring dCache users
The gplazma service is responsible for user authentication, following a scheme inspired by PAM. If you don’t know PAM, this process may seem rather daunting, later chapters will go into authentication in considerable depth.
The dCache RPM comes with a default gPlazma configuration file /etc/dcache/gplazma.conf; however, that configuration is intended for users with X.509 credentials. X.509 credentials require a certificate authority; which require considerable effort to set up.
Therefore, in this initial configuration, we adopt something simpler: username + password authentication. So, delete the current /etc/dcache/gplazma.conf file and create a new one with the following contents:
auth     sufficient  htpasswd
map      sufficient  multimap
account  requisite   banfile
session  requisite   authzdb
The first column is the phases of the authentication process. Each login attempt follows four phases: auth, map, account and session. auth verifies user’s identity. map converts this identity to some dCache user. account checks if the user is allowed to use dCache right now. Finally, session adds some additional information.
This configuration tells gPlazma to use the htpasswd plugin to check any passwords, the multimap plugin to convert usernames into uid and gid values, the banfile plugin to check if the user is allowed to use dCache, and finally use the authzdb plugin to add various session information.
The sufficient and requisite labels describe how to handle errors. For more details on this, see the gplazma chapter.
This ability to split login steps between different plugins may make the process seem complicated; however, it is also very powerful and allows dCache to work with many different authentication schemes.
For the next step, we need to create the configuration for these four plugins. We will create two users: a regular user (“tester”) and an admin user (“admin”).
The htpasswd plugin uses the Apache HTTPD server’s file format to record username and passwords. This file may be maintained by the htpasswd command.
Let us create a new password file (/etc/dcache/htpasswd) and add these two users (“tester” and “admin”) with passwords TooManySecrets and dickerelch respectively:
touch /etc/dcache/htpasswd
htpasswd -bm /etc/dcache/htpasswd tester TooManySecrets
|Adding password for user tester
htpasswd -bm /etc/dcache/htpasswd admin dickerelch
|Adding password for user admin
Next, we need to tell dCache which uid and gids these users should be assigned. To do this, create the file /etc/dcache/multi-mapfile with the following content:
username:tester uid:1000 gid:1000,true
username:admin uid:0 gid:0,true
Additionally we create an empty banfile to make sure the ban file plugin works:
touch /etc/dcache/ban.conf
Finally, we need to provide some session data for this user, which is stored in the authzdb plugin configuration. For backwards compatibility, this plugin’s default configuration location is the file /etc/grid-security/storage-authzdb, where /etc/grid-security is a directory that you may need to create:
mkdir -p /etc/grid-security
After ensuring the directory exists, create the file storage-authzdb file with the following content. Note that the first line of the file must be version 2.1.
version 2.1

authorize tester read-write 1000 1000 /home/tester /
authorize admin read-write 0 0 / /
The authorize line describes how both users are allowed full access to dCache. User tester has a home directory of /home/tester, whereas user admin has the root directory as a home directory. Finally, both users have the system root as their personal root directory.
The uid and gid values must be included in this file, but are ignored by the authzdb plugin: the actual values do not matter.
Finally, we can create the tester user’s home directory, using the chimera shell. This shell provides direct access to the dCache namespace by talking directly with the Chimera database, bypassing dCache.
chimera
|Jul 19, 2019 4:29:17 PM com.hazelcast.config.XmlConfigLocator
|INFO: Loading 'hazelcast.xml' from classpath.
|WARN  - [131.169.240.59]:5701 [dcache-namespace] [3.11.1] No join method is enabled! Starting standalone.
|Type 'help' for help on commands.
|Type 'exit' or Ctrl+D to exit.
|chimera:/# mkdir /home
|chimera:/# mkdir /home/tester
|chimera:/# chown 1000:1000 /home/tester
|chimera:/# ls /home
|total 3
|drwxr-xr-x 3    0    0 512 Jul 19 16:29 .
|drwxrwxrwx 4    0    0 512 Jul 19 16:29 ..
|drwxr-xr-x 2 1000 1000 512 Jul 19 16:29 tester
|chimera:/# exit
Configuring storage
The pool service is responsible for storing the contents of files. Therefore, in order to accept any data, a dCache cluster must have at least one pool. The file’s data is actually stored as files on the local filesystem, using a specified prefix, which is usually a mounted filesystem.
The dcache script provides an easy way to create the pool directory structure and add the pool service to a domain. In the following example, we will create a pool using storage located at /srv/dcache/pool-1 and add this pool to the dCacheDomain domain.
mkdir -p /srv/dcache
dcache pool create /srv/dcache/pool-1 pool1 dCacheDomain
|Created a pool in /srv/dcache/pool-1. The pool was added to dCacheDomain
|in file:/etc/dcache/layouts/mylayout.conf.
The /etc/dcache/layouts/mylayout.conf file should be updated to have an additional pool service:
dcache.enable.space-reservation = false

[dCacheDomain]
 dcache.broker.scheme = none
[dCacheDomain/zookeeper]
[dCacheDomain/admin]
[dCacheDomain/pnfsmanager]
 pnfsmanager.default-retention-policy = REPLICA
 pnfsmanager.default-access-latency = ONLINE

[dCacheDomain/cleaner]
[dCacheDomain/poolmanager]
[dCacheDomain/billing]
[dCacheDomain/gplazma]
[dCacheDomain/webdav]
 webdav.authn.basic = true

[dCacheDomain/pool]
pool.name=pool1
pool.path=/srv/dcache/pool-1
pool.wait-for-files=${pool.path}/data
This new pool is called pool1 and will store all data and metadata within the /srv/dcache/pool-1 path.
The pool.wait-for-files configuration tells dCache to pause during start-up if the data directory is missing. This is a safety feature to prevent dCache accepting data if /srv/dcache/pool-1 is some mounted filesystem and (by mistake) that device is not mounted.
By default, a pool will detect the free capacity on the partition and assume that capacity is available to store dCache files. It is possible to configure pools so they are limited.
MIND THE GAP!
A pool will try to keep the free capacity above some minimum value, rejecting transfers once the free capacity drops to this minimum value. This minimum free size is called the gap. The purpose is to try to allow transfers to succeed, if the protocol does not allow the client to specify the file’s size.
The default gap is 4 GiB. For production systems, this is fine, as such pools are much larger; however, test instances may include smaller pools. If the pool size is comparable to (or smaller than) 4 GiB then you must decrease the pool’s gap.
Perhaps the easiest way to do this is with the admin interface (see below), issuing the
set gappool command (e.g.,\s <pool> set gap 1G). Remember to save the configuration to ensure it survives across dCache restarts (e.g.,\s <pool> save).
Starting dCache
Finally, dCache can be started now.
There are two ways to start dCache. These are as a classic sysV -like daemon or as a systemd service. The latter one is preferred and enforced by default when the hosts operating system supports it. To change this be behavior set
dcache.systemd.strict=false
in dcache.conf or in the layout file.
Using sysV -like daemon
dcache start
|Starting dCacheDomain done
You can observe dCache current status using the dcache status command:
dcache status
|DOMAIN       STATUS                   PID   USER   LOG
|dCacheDomain running (for 18 seconds) 18953 dcache /var/log/dcache/dCacheDomain.log
The domain log file (/var/log/dcache/dCacheDomain.log) also contains some details, logged as dCache starts:
2019-07-19 16:46:06 Launching /bin/java -server -Xmx512m -XX:MaxDirectMemorySize=512m -Dsun.net.inetaddr.ttl=1800 -Dorg.globus.tcp.port.range=20000,25000 -Dorg.dcache.dcap.port=0 -Dorg.dcache.ftp.log-aborted-transfers=true -Dorg.dcache.net.tcp.portrange=33115:33145 -Djava.security.krb5.realm= -Djava.security.krb5.kdc= -Djavax.security.auth.useSubjectCredsOnly=false -Djava.security.auth.login.config=/etc/dcache/jgss.conf -Dcontent.types.user.table=/etc/dcache/content-types.properties -Dzookeeper.sasl.client=false -Dcurator-dont-log-connection-problems=true -XX:+HeapDumpOnOutOfMemoryError -XX:HeapDumpPath=/var/log/dcache/dCacheDomain-oom.hprof -XX:+UseCompressedOops -javaagent:/usr/share/dcache/classes/aspectjweaver-1.9.2.jar -Djava.awt.headless=true -DwantLog4jSetup=n -Ddcache.home=/usr/share/dcache -Ddcache.paths.defaults=/usr/share/dcache/defaults org.dcache.boot.BootLoader start dCacheDomain
19 Jul 2019 16:46:14 (PnfsManager) [] [131.169.240.59]:5701 [dcache-namespace] [3.11.1] No join method is enabled! Starting standalone.
19 Jul 2019 16:49:09 (WebDAV-dcache) [admin NIC auto-discovery] Adding [dcache.example.org/[fe80::f816:3eff:fe3e:36a5], dcache.example.org/131.169.240.59]
19 Jul 2019 16:49:11 (pool1) [] Pool mode changed to disabled(fetch,store,stage,p2p-client,p2p-server): Awaiting initialization
19 Jul 2019 16:49:11 (PoolManager) [pool1 PoolManagerPoolUp] Pool pool1 changed from mode disabled() to disabled(fetch,store,stage,p2p-client,p2p-server).
19 Jul 2019 16:49:11 (pool1) [] Pool mode changed to disabled(store,stage,p2p-client,loading): Loading...
19 Jul 2019 16:49:11 (PoolManager) [pool1 PoolManagerPoolUp] Pool pool1 changed from mode disabled(fetch,store,stage,p2p-client,p2p-server)  to disabled(store,stage,p2p-client,loading).
19 Jul 2019 16:49:11 (pool1) [] Reading inventory from InotifyMonitoring[org.dcache.pool.repository.checksums.ChecksumReplicaStore@497b49cf].
19 Jul 2019 16:49:11 (pool1) [] Pool mode changed to enabled
19 Jul 2019 16:49:11 (PoolManager) [pool1 PoolManagerPoolUp] Pool pool1 changed from mode disabled(store,stage,p2p-client,loading)  to enabled.
Using systemd service
dCache uses systemd’s generator functionality to create a service for each defined domain in the layout file. That’s why, before starting the service all dynamic systemd units should be generated:
systemctl daemon-reload
You need to regenerate dynamic units every time when new domains are added or removed as well as when systemd affected properties are modified. Those properties are: - dcache.user - dcache.java.options.extra - dcache.restart.delay - dcache.home - dcache.java.library.path
To inspect all generated units of dcache.target the systemd list-dependencies command can be used. For example:
systemctl list-dependencies dcache.target
|dcache.target
|● ├─dcache@coreDomain.service
|● ├─dcache@gplazmaDomain.service
|● ├─dcache@namespaceDomain.service
|● ├─dcache@nfsDomain.service
|● ├─dcache@poolDomain.service
|● └─dcache@poolmanagerDomain.service
Each unit can be operated independently, e.g. started, stopped or enabled:
For example:
systemctl start dcache@coreDomain
systemctl status dcache@coreDomain
|● dcache@coreDomain.service - dCache coreDomain domain
|     Loaded: loaded (/run/systemd/generator/dcache@coreDomain.service; generated)
|     Active: active (running) since Fri 2020-06-26 14:56:54 CEST; 10s ago
|   Main PID: 13296 (java)
|      Tasks: 30 (limit: 19031)
|     Memory: 230.6M
|     CGroup: /system.slice/system-dcache.slice/dcache@coreDomain.service
|             └─13296 /usr/bin/java -server -Xmx512m -XX:MaxDirectMemorySize=512m ...
Nevertheless, all services can be operated together as dcache.target
systemctl start dcache.target
ATTENTION: Never use the
sysVdcache script to start or stop dCache when systemd is used to managed dCache as service.
The dCache, with the default logback config, writes domain logs to stdout/err.
All services systemd starts have their stdout/stderr connected to journald. This is the case for dCache as well, as with the default logback config, all domain logs are written to to stdout/err.
To access dcache logs journalctl command can be used:
journalctl -f -u dcache.target
or for a specific domain
journalctl -f -u dcache@coreDomain
Note: The billing, access or event log files, which are still written by dCache itself are still written into log file in the /var/log/dcache directory.
To redirect dcache domain logs into a file the logback.xml file should be adjusted or rsyslog forwarding enabled in /etc/systemd/journald.conf
Transferring data
The dcache ports command allows you to discover on which network ports the services are listening. This is useful to verify your configuration and to configure firewalls appropriately.
dcache ports
|DOMAIN       CELL          SERVICE   PROTO PORT
|dCacheDomain zookeeper     zookeeper TCP   2181
|dCacheDomain WebDAV-dcache webdav    TCP   2880
|dCacheDomain pool1         pool      TCP   20000-25000
|dCacheDomain pool1         pool      TCP   33115-33145
The WebDAV door is listening on port 2880 (the default). We can upload a file into dCache using that protocol, with the curl client.
curl -u tester:TooManySecrets -L -T /bin/bash http://localhost:2880/home/tester/test-file-1
|964544 bytes uploaded
The file may also be downloaded:
curl -u tester:TooManySecrets -L -o /tmp/test-file-1 http://localhost:2880/home/tester/test-file-1
|  % Total    % Received % Xferd  Average Speed   Time    Time     Time  Current
|                                 Dload  Upload   Total   Spent    Left  Speed
|  0     0    0     0    0     0      0      0 --:--:-- --:--:-- --:--:--     0
|100  941k  100  941k    0     0  10.1M      0 --:--:-- --:--:-- --:--:-- 10.1M
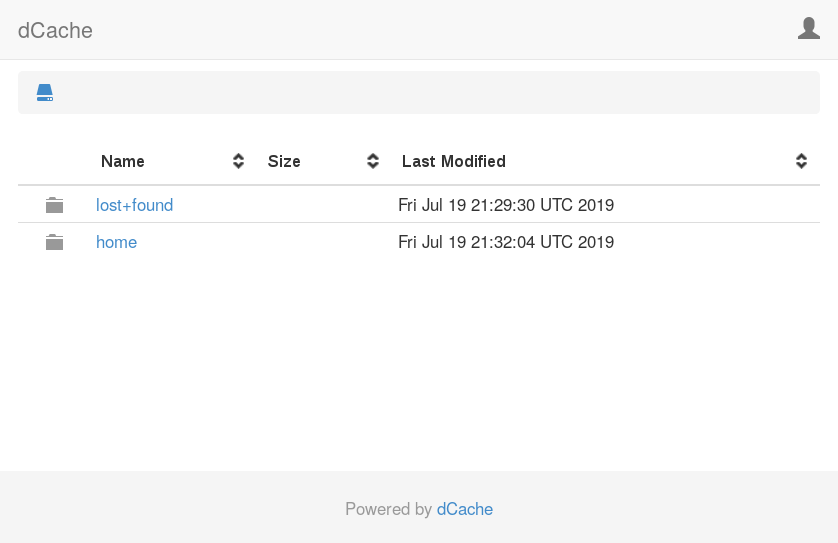
The WebDAV door also includes a limited web interface that allows users to explore the namespace and download specific files. To see this interface, point your favourate web browser at the WebDAV endpoint (http://dcache.example.org:2880/ in this example). After entering the username and password (tester and TooManySecrets respectively), so will see the following page.
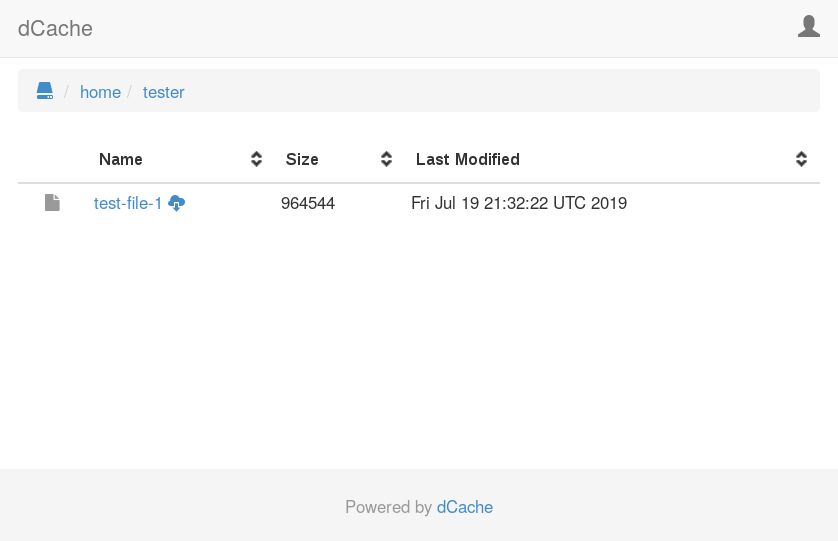
Navigating to the directory /home/tester by selecting the home directory and the tester directory. You will see the expected test-file-1 file.
The admin interface
Built into dCache is a very powerful mechanism to allow admins to inspect details of a running dCache instance and modify many aspects of its behaviour on-the-fly, without restarting any component and without interrupting the service delivered to users.
This interface is known as the admin interface. The admin service provides access to this admin interface by providing an ssh protocol endpoint. You can connect to this interface and will be presented with a shell environment within which you can investigate problems and adjust dCache behaviour.
Given how useful the admin interface is, we will take a short detour to explore the basics.
We can authenticate to the admin interface using the admin user:
ssh -p 22224 admin@localhost
|Password authentication
|Password:
|dCache (5.2.2)
|Type "\?" for help.
The prompt [dcache] (local) admin > indicates that the shell is waiting for a command. The name in square brackets (dcache) is the machine to which you are connected. The name in parenthesis (local) is the fully-qualitified cell name (written CELL@DOMAIN), when connected or local when the shell is not yet connected to a cell. The name after the parenthesis (admin) is the username of the authenticated user.
Here is some instructions to try, as a quick introduction and to verify the interface is working as expected.
First lets quickly look at the backslash commands. These are meta-commands that operate on the shell itself, rather than on individual cells within dCache. The \? command shows the list of available meta-commands.
[dcache] (local) admin > \?
\? [command]...  # display help for shell commands
\c cell[@domain] [user]  # connect to cell
\exception [trace]  # controls display of stack traces
\h [command]...  # display help for cell commands
\l [cell[@domain]|pool/poolgroup]...  # list cells
\q # quit
\s [OPTIONS] (cell[@domain]|pool/poolgroup)[,(cell[@domain]|pool/poolgroup)]... command...  # send command
\sl [options] pnfsid|path command...  # send to locations
\sn [options] command...  # send pnfsmanager command
\sp [options] command...  # send poolmanager command
\timeout [seconds]  # sets the command timeout
Detailed help is available for a specific meta-command:
[dcache] (local) admin > \? \l
NAME
       \l -- list cells

SYNOPSIS
       \l [cell[@domain]|pool/poolgroup]...

DESCRIPTION
       Lists all matching cells. The argument is interpreted as a glob.
       If no domain suffix is provided, only well known cells are
       listed. Otherwise all matching cells in all matching domains are
       listed.

ARGUMENTS
       cell[@domain]|pool/poolgroup
              A glob pattern. An empty CELL, DOMAIN, POOL or POOLGROUP
              string matches any name. Defaults to *.
Let’s run the \l command, to list the running cells. Note that the name of the WebDAV cell depends on the machine’s name, so the output may look slightly different.
[dcache] (local) admin > \l
acm
billing
cleaner
gPlazma
PnfsManager
pool1
PoolManager
WebDAV-dcache
zookeeper
The ‘\c’ meta-command connects the shell to a specific cell, so subsequent commands are sent there for evaluation. We will first connect to the WebDAV cell.
[dcache] (local) admin > \c WebDAV-dcache
You should see the prompt change when the command is successful. The name in parenthesis (local above) is the full name of the cell: WebDAV-dcache@dCacheDomain.
Now, lets try two commands that all cells implement: ‘help’ and ‘info’.
The ‘help’ command provides a list of commands this cell understands:
[dcache] (WebDAV-dcache@dCacheDomain) admin > help
bean dep # show bean dependencies
bean ls # list running beans
bean messages [<bean>]  # show message types handled by beans
bean properties <bean>  # show properties of a bean
bean property <property>  # show property of a bean
dump pinboard <file>  # write pinboard to file
get children [-binary]
get door info [-binary]
help [-format=PLAIN|ANSI] [<command>]...  # display help pages
info [-a] [-l]  # get detailed cell information
infox <bean>  # show status information about bean
lb disable [-read] [-write]  # suspend publishing capabilities
lb enable [-read] [-write]  # resume publishing capabilities
lb set tags [<tags>]...  # set published tags
lb set threshold <load>  # set threshold load for OOB updates
lb set update <seconds>  # set login broker update frequency
log ls [-a] [<appender>] [<logger>]
log reset [-a] <appender> [<logger>]
log set <appender> [<logger>] OFF|ERROR|WARN|INFO|DEBUG|TRACE|ALL
login clear cache  # clear cached result of login and identity mapping oprations
login dump cache  # dump cached result of login and identity mapping oprations
monitoring disable # disable message monitoring
monitoring enable # gather message handling statistics
monitoring info # display message monitoring information
reload template # refresh HTML template from file
show pinboard [<lines>]  # display the most recent pinboard messages
xgetcellinfo # get this cell information
As with the \? meta-command help, the cell help command may be used to discover detailed information about a specific cell command. Here is the help information for the info command:
[dcache] (WebDAV-dcache@dCacheDomain) admin > help info
NAME
       info -- get detailed cell information

SYNOPSIS
       info [-a] [-l]

DESCRIPTION
       Shows detailed information about this cell. The returned
       information can contain the performance statistics, past and
       current activities of the cell. This usually depends on the type
       of cell.

OPTIONS
         -a
              Display content of unanswered message requests.
         -l
              Display unanswered message requests.
Let’s run the info command, to see typical output for a WebDAV door:
[dcache] (WebDAV-dcache@dCacheDomain) admin > info
--- cache-login-strategy (Processes mapping requests) ---
gPlazma login cache: CacheStats{hitCount=0, missCount=1, loadSuccessCount=1, loadExceptionCount=0, totalLoadTime=8287060, evictionCount=0}
gPlazma map cache: CacheStats{hitCount=0, missCount=0, loadSuccessCount=0, loadExceptionCount=0, totalLoadTime=0, evictionCount=0}
gPlazma reverse map cache: CacheStats{hitCount=0, missCount=0, loadSuccessCount=0, loadExceptionCount=0, totalLoadTime=0, evictionCount=0}

--- lb (Registers the door with a LoginBroker) ---
    LoginBroker      : LoginBrokerTopic@local
    Protocol Family  : http
    Protocol Version : 1.1
    Port             : 2880
    Addresses        : [dcache.example.org/fe80:0:0:0:f816:3eff:fe3e:36a5, dcache.example.org/131.169.240.59]
    Tags             : [cdmi, dcache-view, glue, srm, storage-descriptor]
    Root             : /
    Read paths       : [/]
    Write paths      : [/]
    Update Time      : 5 SECONDS
    Update Threshold : 10 %
    Last event       : UPDATE_SENT

--- path-mapper (Mapping between request paths and dCache paths with OwnCloud Sync client-specific path trimming.) ---
Root path : /

--- pool-monitor (Maintains runtime information about all pools) ---
last refreshed = 2019-07-24 22:26:20.108 (23 seconds ago)
refresh count = 83
active refresh target = [>PoolManager@local]

--- resource-factory (Exposes dCache resources to Milton WebDAV library) ---
Allowed paths: /
IO queue     :
As a final demonstrator, let’s discover the internal identifier (called a PNFS-ID) of the uploaded file, which pool is hosting this file and the current status of that replica.
We will use the \s meta-command to direct the command to specific cells, rather than targeting the current cell. The \sn command targets dCache’s namespace and is simply a short-hand for the \s PnfsManager command.
[dcache] (WebDAV-dcache@dCacheDomain) admin > \sn pnfsidof /home/tester/test-file-1
0000F3BF2D92435E4D9A9EFA1470F1214A0D

[dcache] (WebDAV-dcache@dCacheDomain) admin > \sn cacheinfoof /home/tester/test-file-1
 pool1

[dcache] (WebDAV-dcache@dCacheDomain) admin > \s pool1 rep ls 0000F3BF2D92435E4D9A9EFA1470F1214A0D
0000F3BF2D92435E4D9A9EFA1470F1214A0D <C-------X--L(0)[0]> 964544 si={<Unknown>:<Unknown>}
The output from the rep ls command is described in the online help:
[dcache] (WebDAV-dcache@dCacheDomain) admin > \s pool1 help rep ls
NAME
       rep ls -- list replicas

SYNOPSIS
       rep ls [-binary] [-l=[s|p|l|u|nc|e...]] [-s=[k|m|g|t]]
       [-storage=<glob>] [-sum] [<pnfsids>]...

DESCRIPTION
       List the replicas in this pool.

       Each line has the following format:

          PNFSID <STATE> <SIZE> <STORAGE CLASS>

       STATE is a sequence of fields:
          field 1 is "C"
             if entry is cached and "-" otherwise.
          field 2 is "P"
             if entry is precious and "-" otherwise.
          field 3 is "C"
             if entry is being transferred "from client" and "-"
             otherwise.
          field 4 is "S"
             if entry is being transferred "from store" and "-"
             otherwise.
          field 5 is unused.
          field 6 is unused.
          field 7 is "R"
             if entry is removed but still open and "-" otherwise.
          field 8 is "D"
             if entry is removed and "-" otherwise.
          field 9 is "X"
             if entry is sticky and "-" otherwise.
          field 10 is "E"
             if entry is in error state and "-" otherwise.
          field 11 is unused.
          field 12 is "L(0)(n)"
             where is the link count.

ARGUMENTS
       <pnfsids>
              Limit to these replicas.

OPTIONS
         -binary
              Return statistics in binary format instead.
         -l=[s|p|l|u|nc|e...]
              Limit to replicas with these flags:
                 s  : sticky
                 p  : precious
                 l  : locked
                 u  : in use
                 nc : not cached
                 e  : error
         -s=[k|m|g|t]
              Output per storage class statistics instead. Optionally
              use KiB, MiB, GiB, or TiB.
         -storage=<glob>
              Limit to replicas with matching storage class.
         -sum
              Include totals for all storage classes when used with -s
              or -binary.
A complete copy of the file’s data is stored as a file within the pool’s data directory, using the PNFS-ID as the filename:
ls -l /srv/dcache/pool-1/data
|-rw-r--r--. 1 dcache dcache 964544 Jul 19 21:26 0000F3BF2D92435E4D9A9EFA1470F1214A0D
Note that you should never need to access the files stored on the pool directly: dCache will mediate all network access.
Deleting files
We will use the WebDAV door to delete the uploaded file, again using curl as the client:
curl -u tester:TooManySecrets -X DELETE http://localhost:2880/home/tester/test-file-1
Subsequent attempts to download this file will fail:
curl -sD- -u tester:TooManySecrets -o/dev/null http://localhost:2880/home/tester/test-file-1
|HTTP/1.1 404 Not Found
|Date: Wed, 31 Jul 2019 22:15:21 GMT
|Server: dCache/5.2.2
|Content-Type: text/html
|Transfer-Encoding: chunked
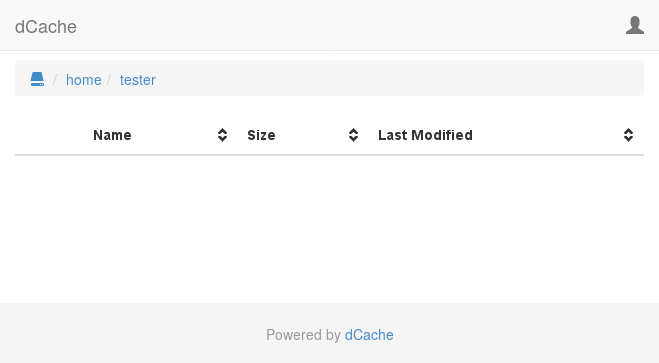
A directory listing using the WebDAV interface also shows the file is no longer present:
One feature of dCache is that the data stored in dCache is not deleted as part of the above command, but is done in a lazy fashion. The purpose is to avoid that users who delete large numbers of files keep pools busy, preventing attempts to read other data stored on those pools. Instead, the data of deleted files is removed by the cleaner service so as it doesn’t stress pools.
Therefore, if you are quick enough, you can still see the delete file’s data stored as a file with the PNFS-ID of the file (0000F3BF2D92435E4D9A9EFA1470F1214A0D in our example).
You can use the rundelete admin command to force cleaner to garbage-collect any deleted file’s data; e.g.,
ssh -p 22224 admin@localhost '\s cleaner rundelete'
|Password authentication
|Password:
Billing logging
One of the most important log files in dCache is billing. This is the output from the billing service and, by default, is written as files in the directory based on the year and month; e.g., /var/lib/dcache/billing/2019/07.
The file’s contain considerable information about each time a file is uploaded into dCache, written to tape, read back from tape, internally (within dCache) copied, read back by a client, and deleted. This often proves very useful in understanding why a file is no longer present, or checking when a file was written to tape.
Whenever a file is transferred between a client and dCache, two records a written: one from the door and one from the pool. Also, when a file is deleted, the door writes a billing record when the file is deleted in the namespace, and the pool writes a record when the file’s data is removed.
You should see these records when viewing the billing file like /var/lib/dcache/billing/2019/07/billing-2019.07.31, adjusting for the current day.
Here is an example from the billing file:
## door-request-info-message $date$ [$cellType$:$cellName$:$type$] ["$owner$":$uid$:$gid$:$clientChain$] [$pnfsid$,$filesize$] [$path$] $if(storage)$$storage.storageClass$@$storage.hsm$$else$<Unknown>$endif$ $transactionTime$ $queuingTime$ {$rc$:"$message$"}
## mover-info-message $date$ [$cellType$:$cellName.cell$:$type$] [$pnfsid$,$filesize$] [$path$] $if(storage)$$storage.storageClass$@$storage.hsm$$else$<Unknown>$endif$ $transferred$ $connectionTime$ $created$ {$protocol$} [$initiator$] {$rc$:"$message$"}
## warning-pnfs-file-info-message $date$ [$cellType$:$cellName$:$type$] {$rc$:"$message$"}
## remove-file-info-message $date$ [$cellType$:$cellName$:$type$] [$pnfsid$,$filesize$] [$path$] $if(storage)$$storage.storageClass$@$storage.hsm$$else$<Unknown>$endif$ {$rc$:"$message$"}
## pool-hit-info-message $date$ [$cellType$:$cellName.cell$:$type$] [$pnfsid$,$filesize$] [$path$] $if(storage)$$storage.storageClass$@$storage.hsm$$else$<Unknown>$endif$ $cached$ {$protocol$} {$rc$:"$message$"}
## storage-info-message $date$ [$cellType$:$cellName$:$type$] [$pnfsid$,$filesize$] [$path$] $if(storage)$$storage.storageClass$@$storage.hsm$$else$<Unknown>$endif$ $transferTime$ $queuingTime$ {$rc$:"$message$"}
08.05 07:47:49 [pool:pool1:transfer] [0000FA09235CA0974697AB93F00FFEA61620,964544] [/home/tester/test-file-1] <Unknown>:<Unknown>@osm 964544 323 true {Http-1.1:0:0:0:0:0:0:0:1:0:WebDAV-dcache:dCacheDomain:/home/tester/test-file-1} [door:WebDAV-dcache@dCacheDomain:AAWPWeyoBWg:1564991268926000] {0:""}
08.05 07:47:49 [door:WebDAV-dcache@dCacheDomain:request] ["tester":1000:1000:0:0:0:0:0:0:0:1] [0000FA09235CA0974697AB93F00FFEA61620,964544] [/home/tester/test-file-1] <Unknown>:<Unknown>@osm 681 0 {0:""}
08.05 07:47:55 [pool:pool1:transfer] [0000FA09235CA0974697AB93F00FFEA61620,964544] [/home/tester/test-file-1] <Unknown>:<Unknown>@osm 964544 74 false {Http-1.1:0:0:0:0:0:0:0:1:0:WebDAV-dcache:dCacheDomain:/home/tester/test-file-1} [door:WebDAV-dcache@dCacheDomain:AAWPWe0LXwA:1564991275384000] {0:""}
08.05 07:47:55 [door:WebDAV-dcache@dCacheDomain:request] ["tester":1000:1000:0:0:0:0:0:0:0:1] [0000FA09235CA0974697AB93F00FFEA61620,964544] [/home/tester/test-file-1] <Unknown>:<Unknown>@osm 205 0 {0:""}
08.05 07:48:19 [door:WebDAV-dcache@dCacheDomain:remove] ["tester":1000:1000:unknown] [0000FA09235CA0974697AB93F00FFEA61620,964544] [/home/tester/test-file-1] <Unknown> 0 0 {0:""}
08.05 07:48:38 [pool:pool1@dCacheDomain:remove] [0000FA09235CA0974697AB93F00FFEA61620,964544] [Unknown] <Unknown>:<Unknown>@osm {0:"cleaner@dCacheDomain [PoolRemoveFiles]"}
Lines that start with a hash (#) symbol are comments; the double-hash comments at the beginning of the file are added automatically and record the structure of the file.
The first two non-comment lines record test-file-1 being uploaded. Of these two, the first line records information from the pool while the second records information from the WebDAV door.
08.05 07:47:49 [pool:pool1:transfer] [0000FA09235CA0974697AB93F00FFEA61620,964544] [/home/tester/test-file-1] <Unknown>:<Unknown>@osm 964544 323 true {Http-1.1:0:0:0:0:0:0:0:1:0:WebDAV-dcache:dCacheDomain:/home/tester/test-file-1} [door:WebDAV-dcache@dCacheDomain:AAWPWeyoBWg:1564991268926000] {0:""}
08.05 07:47:49 [door:WebDAV-dcache@dCacheDomain:request] ["tester":1000:1000:0:0:0:0:0:0:0:1] [0000FA09235CA0974697AB93F00FFEA61620,964544] [/home/tester/test-file-1] <Unknown>:<Unknown>@osm 681 0 {0:""}
The next two lines record the download of test-file-1: one line shows information from the pool and the other information from the WebDAV door.
08.05 07:47:55 [pool:pool1:transfer] [0000FA09235CA0974697AB93F00FFEA61620,964544] [/home/tester/test-file-1] <Unknown>:<Unknown>@osm 964544 74 false {Http-1.1:0:0:0:0:0:0:0:1:0:WebDAV-dcache:dCacheDomain:/home/tester/test-file-1} [door:WebDAV-dcache@dCacheDomain:AAWPWe0LXwA:1564991275384000] {0:""}
08.05 07:47:55 [door:WebDAV-dcache@dCacheDomain:request] ["tester":1000:1000:0:0:0:0:0:0:0:1] [0000FA09235CA0974697AB93F00FFEA61620,964544] [/home/tester/test-file-1] <Unknown>:<Unknown>@osm 205 0 {0:""}
The final two lines show the file being deleted. The first line shows when the file was deleted by the client. The second line records the file’s data being deleted by the pool.
08.05 07:48:19 [door:WebDAV-dcache@dCacheDomain:remove] ["tester":1000:1000:unknown] [0000FA09235CA0974697AB93F00FFEA61620,964544] [/home/tester/test-file-1] <Unknown> 0 0 {0:""}
08.05 07:48:38 [pool:pool1@dCacheDomain:remove] [0000FA09235CA0974697AB93F00FFEA61620,964544] [Unknown] <Unknown>:<Unknown>@osm {0:"cleaner@dCacheDomain [PoolRemoveFiles]"}
Access log file
The final log file to review here is the access log file. This provides you with a wealth of information when diagnosing problems with specific clients. The access log file is a file in the same directory as the domain log file, but with the .log end replaced with .access. In our case, the file is /var/log/dcache/dCacheDomain.access.
Each line in this file describes a low-level protocol request make by a client along with the corresponding response from dCache. Some protocols (such as FTP, xroot and NFS) may involve many such interactions even if the client is simply transferring the contents of a file. A HTTP/WebDAV client, by comparsion, typically makes a single request to transfer data.
level=INFO ts=2019-08-05T07:47:49.337+0000 event=org.dcache.webdav.request request.method=PUT request.url=http://localhost:2880/home/tester/test-file-1 response.code=307 location=http://[0:0:0:0:0:0:0:1]:23981/home/tester/test-file-1?dcache-http-uuid=c3ebcc92-9232-4739-a7b4-f6a4ca1d9b0c socket.remote=[::1]:39720 user-agent=curl/7.29.0 user.mapped=1000:1000 transaction=door:WebDAV-dcache@dCacheDomain:AAWPWeyoBWg:1564991268926000
level=INFO ts=2019-08-05T07:47:55.526+0000 event=org.dcache.webdav.request request.method=GET request.url=http://localhost:2880/home/tester/test-file-1 response.code=302 location=http://[0:0:0:0:0:0:0:1]:22575/home/tester/test-file-1?dcache-http-uuid=475d380a-4b8a-4a62-9247-8df5c9817988 socket.remote=[::1]:39724 user-agent=curl/7.29.0 user.mapped=1000:1000 transaction=door:WebDAV-dcache@dCacheDomain:AAWPWe0LXwA:1564991275384000
level=INFO ts=2019-08-05T07:48:19.020+0000 event=org.dcache.webdav.request request.method=DELETE request.url=http://localhost:2880/home/tester/test-file-1 response.code=204 socket.remote=[::1]:39728 user-agent=curl/7.29.0 user.mapped=1000:1000
level=WARN ts=2019-08-05T07:48:23.762+0000 event=org.dcache.webdav.request request.method=GET request.url=http://localhost:2880/home/tester/test-file-1 response.code=404 response.reason="Not Found" socket.remote=[::1]:39730 user-agent=curl/7.29.0 user.mapped=1000:1000
These lines show:
- the successful upload (
PUTrequest) for the filetest-file-1, - the successful download (
GETrequest) of this file, - the successful deletion (
DELETErequest), - an unsuccessful attempt to download the deleted file.
Note that, by default, dCache will log-rotate and delete the access log files on a fairly agressive schedule. This is because the access log file contains low-level protocol information and it would quickly become very large.
Step 2. Splitting services into domains
In this step, we will split the services into multiple domains. A domain is a JVM process that is cooperating with others to build the complete dCache instance.
Motivation
Although our dCache instance is working, the deployment of services are not particularly convenient.
First, a single domain does not scale. As you have more people using dCache, you will require more CPU, memory or storage capacity. Eventually, you will reach the limit of what a single machine can provide and would like to expand dCache to use a cluster of machines.
Second, many operational interventions (such as adding or removing services, or modifying some configuration) require restarting the domain. If everything is running in a single domain then restarting dCache will result in failed transfers and unhappy users.
In this step, we will split the services into three domains.
There is nothing special about having three domains. At one extreme, dCache will work correctly if everything runs in a single domain. On the other extreme, you can configure dCache to run each service in a separate domain. Although the latter deployment is the most flexible, there is some overhead in having many domains, so the optimal approach is usually somewhere in between these two extremes.
dCache messages
Services communicate with each other by sending messages. This is true for both our single-domain dCache instance and one spanning many thousands of machines. The difference is that, when a dCache instance spans multiple domains, there needs to be some mechanism for sending messages between services located in different domains.
This is done by establishing tunnels between domains. A tunnel is a TCP connection over which all messages from one domain to the other are sent.
To reduce the number of TCP connections, domains may be configured to be core domains or satellite domains. Core domains have tunnels to all other core domains. Satellite domains have tunnels to all core domains.
The simplest deployment has a single core domain and all other domains as satellite domains. This is a spoke deployment, where messages from a service in any satellite domain is sent directly to the core domain, but messages between services in different satellite domains are relayed through the core domain.
Updating the layout file
We will create three domains: poolsDomain, centralDomain, and doorsDomain. The centralDomain will be a core domain and the other two will be satellite domains.
This may sound quite complicated, but is actually involves doing just three things: renaming dCacheDomain to either centralDomain, doorsDomain or poolsDomain, adding the missing domain definitions, and adding a single configuration line to say the centralDomain is a core domain.
First, stop dCache
dcache stop
|Stopping dCacheDomain 0 1 2 3 4 5 6 done
Next, update the layout file. The following shows the final version, after applying all the updates.
dcache.enable.space-reservation = false

[centralDomain]
 dcache.broker.scheme = core
[centralDomain/zookeeper]
[centralDomain/admin]
[centralDomain/pnfsmanager]
 pnfsmanager.default-retention-policy = REPLICA
 pnfsmanager.default-access-latency = ONLINE

[centralDomain/cleaner]
[centralDomain/poolmanager]
[centralDomain/billing]
[centralDomain/gplazma]

[doorsDomain]
[doorsDomain/webdav]
 webdav.authn.basic = true

[poolsDomain]
[poolsDomain/pool]
pool.name=pool1
pool.path=/srv/dcache/pool-1
pool.wait-for-files=${pool.path}/data
Third, verify new configuration by checking the status of the different domains:
dcache status
|DOMAIN        STATUS  PID USER   LOG
|centralDomain stopped     dcache /var/log/dcache/centralDomain.log
|doorsDomain   stopped     dcache /var/log/dcache/doorsDomain.log
|poolsDomain   stopped     dcache /var/log/dcache/poolsDomain.log
You can also check in which domains the different services are deployed:
dcache services
|DOMAIN        SERVICE     CELL          PROXIED REPLICABLE
|centralDomain zookeeper   zookeeper     -       No
|centralDomain pnfsmanager PnfsManager   -       Yes
|centralDomain cleaner     cleaner       -       No
|centralDomain poolmanager PoolManager   -       Yes
|centralDomain admin       admin         -       No
|centralDomain billing     billing       -       Yes
|centralDomain gplazma     gPlazma       -       Yes
|doorsDomain   webdav      WebDAV-dcache No      No
|poolsDomain   pool        pool1         -       No
Start dCache:
dcache start
|Starting centralDomain done
|Starting doorsDomain done
|Starting poolsDomain done
Verify the status of these three domains:
dcache status
|DOMAIN        STATUS                  PID   USER   LOG
|centralDomain running (for 2 minutes) 11831 dcache /var/log/dcache/centralDomain.log
|doorsDomain   running (for 2 minutes) 11883 dcache /var/log/dcache/doorsDomain.log
|poolsDomain   running (for 2 minutes) 11938 dcache /var/log/dcache/poolsDomain.log
Once dCache is running, you can try uploading and downloading files to verify that dCache is working as expected.
Step 3. Adding X.509 host credentials
One problem common to all services on the Internet is how a client is sure it is talking with the correct server, and not an impostor. A commonly used solution is for the server to use an X.509 certificate to identify itself, with the certificate issued by a certificate authority that the client trusts.
dCache supports several protocols that can use X.509 certificate authentication, including the HTTP/WebDAV. In this step, we will update our WebDAV door to use an X.509 certificate.
Obtaining an X.509 certificate
One issue is how to obtain an X.509 certificate from a certificate authority that the client trust. There are several approaches:
-
obtain a certificate from a commercial CA,
-
generate a self-sign certificate and run the client with insecure settings,
-
establish a new certificate authority, which will issue the certificate and update the client to trust your CA,
-
obtain a certificate from an IGTF affiliated CA,
-
obtain a free certificate from Let’s Encrypt.
The decision on which option to adopt is often not completely open: different sites are under different constraints. Therefore, in this section, we will discuss using a commercial provider, using Let’s Encrypt, and obtaining a certificate from IGTF CA, as these are the most likely solutions.
Handling PKCS12 format
Many CAs will use your web-browser when interacting with their service, which results in your web-browser containing a copy of the X.509 host credential. You must then save the host credential from your web-browser before copying it onto the specific dCache node.
Web-browsers will typically save X.509 credentials in PKCS12 format, while dCache requires the credential to be saved as two files, with both files using the PEM format. Therefore you must convert the PKCS12 file (from the web-browser) into the two PEM format files.
Converting from a PKCS12 format file to PEM format files is a common task, and is easily achieved using the pkcs12 command from OpenSSL. For example, the following OpenSSL commands convert the credential host-credential.p12 from PKCS12 to the desired PEM format:
openssl pkcs12 -in host-credential.p12 -out hostcert.pem -clcerts -nokeys
openssl pkcs12 -in host-credential.p12 -out hostkey.pem -nocerts -nodes
By default, dCache expectes these files to be in the /etc/grid-security directory, and they must be readable by the dcache user; e.g.,
cp hostcert.pem hostkey.pem /etc/grid-security
chown dcache /etc/grid-security/hostcert.pem /etc/grid-security/hostkey.pem
chmod 644 /etc/grid-security/hostcert.pem
chmod 400 /etc/grid-security/hostkey.pem
Using a commercial certificate authority
Obtaining a commercially issued certificate should be straight-forward, as the CA should provide good support in using their service.
Commercial services may make their certificates available through a web-browser. If so, you will need to convert them from PKCS12 to PEM format (see above).
Using an IGTF affiliated CA
Many countries have certificate authorities that provide research institutes and universities with a X.509 certification service. There is no common approach to requesting a certificate from these services, so you should review the CA’s documentation to understand how to request a certificate and how to receive the certificate, once it is issued.
As with commercial services, IGTF affiliated CAs typically provide a web interface for users to interact with their service. If so, you will need to convert the credential from PKCS12 to PEM format (see above).
Using Let’s Encrypt
The Let’s Encrypt service provides a way that admins can obtain X.509 host credentials quickly, cheaply and easily. If you are not familiar with X.509 server credentials and you do not already have a preferred X.509 credential provider, Let’s Encrypt is probably the quickest way of getting a host credential.
There are many clients that work with the Let’s Encrypt service. The instructions here use the certbot client, which is perhaps the most popular choice. However, other Let’s Encrypt clients should also work.
The certbot client is available as part of the Extended Packages For Enterprise Linux (EPEL) repository.
So our first step is to install support for CentOS-7 variant of EPEL, if this isn’t already installed.
rpm -Uvh https://dl.fedoraproject.org/pub/epel/epel-release-latest-7.noarch.rpm
|Retrieving https://dl.fedoraproject.org/pub/epel/epel-release-latest-7.noarch.rpm
|warning: /var/tmp/rpm-tmp.x6WSuw: Header V3 RSA/SHA256 Signature, key ID 352c64e5: NOKEY
|Preparing...                          ################################# [100%]
|Updating / installing...
|   1:epel-release-7-11                ################################# [100%]
With EPEL packages now available, we can simply install the certbot package.
yum install certbot
|Loaded plugins: fastestmirror
|Loading mirror speeds from cached hostfile
|epel/x86_64/metalink                                                      |  29 kB  00:00:00
| * base: ftp.fau.de
| * epel: mirror.karneval.cz
| * extras: centos.mirrors.as250.net
| * updates: ftp.rz.uni-frankfurt.de
|epel                                                                      | 5.3 kB  00:00:00
|(1/3): epel/x86_64/updateinfo                                             | 993 kB  00:00:00
|(2/3): epel/x86_64/group_gz                                               |  88 kB  00:00:00
|(3/3): epel/x86_64/primary_db                                             | 6.8 MB  00:00:00
|Resolving Dependencies
|--> Running transaction check
|---> Package certbot.noarch 0:0.35.1-1.el7 will be installed
|[...]
|
|Installed:
|  certbot.noarch 0:0.35.1-1.el7
|
|Dependency Installed:
|  pyOpenSSL.x86_64 0:0.13.1-4.el7              python-cffi.x86_64 0:1.6.0-5.el7
|  python-enum34.noarch 0:1.0.4-1.el7           python-idna.noarch 0:2.4-1.el7
|  python-ndg_httpsclient.noarch 0:0.3.2-1.el7  python-ply.noarch 0:3.4-11.el7
|  python-pycparser.noarch 0:2.14-1.el7         python-requests-toolbelt.noarch 0:0.8.0-1.el7
|  python-zope-component.noarch 1:4.1.0-5.el7   python-zope-event.noarch 0:4.0.3-2.el7
|  python-zope-interface.x86_64 0:4.0.5-4.el7   python2-acme.noarch 0:0.35.1-1.el7
|  python2-certbot.noarch 0:0.35.1-1.el7        python2-configargparse.noarch 0:0.11.0-1.el7
|  python2-cryptography.x86_64 0:1.7.2-2.el7    python2-future.noarch 0:0.16.0-15.20181019gitbee0f3b.el7
|  python2-josepy.noarch 0:1.2.0-1.el7          python2-mock.noarch 0:1.0.1-10.el7
|  python2-parsedatetime.noarch 0:2.4-5.el7     python2-pyasn1.noarch 0:0.1.9-7.el7
|  python2-pyrfc3339.noarch 0:1.0-2.el7         python2-requests.noarch 0:2.6.0-0.el7
|  python2-six.noarch 0:1.9.0-0.el7             pytz.noarch 0:2016.10-2.el7
|
|Complete!
Note
The output from the
yum installcommand is quite large, as certbot requires many python dependencies to be installed. Because of this, the output has been cropped.
With certbot package installed, run the certbot command to obtain the certificate:
certbot certonly --standalone
|Saving debug log to /var/log/letsencrypt/letsencrypt.log
|Plugins selected: Authenticator standalone, Installer None
|Enter email address (used for urgent renewal and security notices) (Enter 'c' to
|cancel): paul.millar@desy.de
|Starting new HTTPS connection (1): acme-v02.api.letsencrypt.org
|
|- - - - - - - - - - - - - - - - - - - - - - - - - - - - - - - - - - - - - - - -
|Please read the Terms of Service at
|https://letsencrypt.org/documents/LE-SA-v1.2-November-15-2017.pdf. You must
|agree in order to register with the ACME server at
|https://acme-v02.api.letsencrypt.org/directory
|- - - - - - - - - - - - - - - - - - - - - - - - - - - - - - - - - - - - - - - -
|(A)gree/(C)ancel: A
|
|- - - - - - - - - - - - - - - - - - - - - - - - - - - - - - - - - - - - - - - -
|Would you be willing to share your email address with the Electronic Frontier
|Foundation, a founding partner of the Let's Encrypt project and the non-profit
|organization that develops Certbot? We'd like to send you email about our work
|encrypting the web, EFF news, campaigns, and ways to support digital freedom.
|- - - - - - - - - - - - - - - - - - - - - - - - - - - - - - - - - - - - - - - -
|(Y)es/(N)o: N
|Please enter in your domain name(s) (comma and/or space separated)  (Enter 'c'
|to cancel): dcache.example.org
|Obtaining a new certificate
|Performing the following challenges:
|http-01 challenge for dcache.example.org
|Waiting for verification...
Once the certificate has been issued, you can ask certbot to list the available credentials:
certbot certificates
|Found the following certs:
|  Certificate Name: dcache.example.com
|    Domains: dcache.example.com
|    Expiry Date: 2017-02-19 19:53:00+00:00 (VALID: 30 days)
|    Certificate Path: /etc/letsencrypt/live/dcache.example.org/fullchain.pem
|    Private Key Path: /etc/letsencrypt/live/dcache.example.org/privkey.pem
dCache has a standard location for the X.509 certificate and corresponding private key. It expects these two files to be located in the /etc/grid-security directory as the files hostcert.pem and hostkey.pem, respectively.
To satify this, we can copy the files to dCache’s expected location, taking care that they have the correct ownership and permissions:
cp /etc/letsencrypt/live/dcache.example.org/fullchain.pem /etc/grid-security/hostcert.pem
cp /etc/letsencrypt/live/dcache.example.org/privkey.pem /etc/grid-security/hostkey.pem
chown dcache /etc/grid-security/hostcert.pem /etc/grid-security/hostkey.pem
chmod 644 /etc/grid-security/hostcert.pem
chmod 400 /etc/grid-security/hostkey.pem
Updating dCache to use certificate
Update the WebDAV door configuration so that it now uses TLS:
[doorsDomain/webdav]
 webdav.authn.protocol = https
The previous configuration property (webdav.authn.basic = true) is no longer needed: BASIC authentication is enabled (by default) for HTTPS endpoints.
Now restart the doors domain for these configurational changes to have an effect:
dcache restart doorsDomain
|Stopping doorsDomain 0 done
|Starting doorsDomain done
Verifying certificate works.
You should now be able to use the https URI scheme with WebDAV door; e.g., https://dcache.example.org:2880/
Uploads and downloads with curl should work as before, but with https:// instead of http://.
Similarly, you should be able to point your favourate web browser at the endpoint and see the expected content along with that browser’s way of showing the connection is encrypted and trust-worthy.
Step 4. Supporting more protocols
dCache supports many more protocols that just HTTP/WebDAV. In this step, we shall update the dCache configuration so the dCache instance supports some additional protocols.
Supporting both unencrypted and encrypted WebDAV
As a first step, let’s enable both encrypted and unencrypted WebDAV access. To do this, we need to update the doorsDomain to run two webdav services.
Update the layout file so the doorsDomain part looks like:
[doorsDomain]
[doorsDomain/webdav]
 webdav.loginbroker.port = 8080
 webdav.cell.name = WebDAV-U-${host.name}

[doorsDomain/webdav]
 webdav.loginbroker.port = 8443
 webdav.authn.protocol = https
 webdav.cell.name = WebDAV-S-${host.name}
The other parts of the layout file (centralDomain and poolsDomain) should remain unchanged.
This updated configuration creates two WebDAV doors. The first one listens on TCP port 8080 and uses an unencrypted connection. The other listens on TCP port 8443 and uses an encrypted connection.
Cell names must be unique within a domain, so at least one of these WebDAV services must specify a non-default cell name. The above configuration specifies both so they have consistent names, with U for unencrypted and S for secure.
Similarly, the two WebDAV services cannot listen on the name TCP network port, so at least one must listen on a non-default port number. The above configures both doors to use a non-default port as ports 8080 and 8443 are commonly used for unencrypted and encrypted HTTP/WebDAV connections.
As above, we must restart the doorsDomain for these changes to have an effect:
dcache restart doorsDomain
|Stopping doorsDomain 0 done
|Starting doorsDomain done
Supporting REST API with dCacheView
dCache provides a REST API for accessing dCache’s advance features. REST is a common approach to expose server features for client use.
To enable support, add the frontend service to the layout file:
[doorsDomain]
[doorsDomain/webdav]
 webdav.loginbroker.port = 8080
 webdav.cell.name = WebDAV-U-${host.name}

[doorsDomain/webdav]
 webdav.loginbroker.port = 8443
 webdav.authn.protocol = https
 webdav.cell.name = WebDAV-S-${host.name}

[doorsDomain/frontend]
and restart doorsDomain.
dcache restart doorsDomain
|Stopping doorsDomain 0 done
|Starting doorsDomain done
The userguide’s chapter on frontend contains considerable information on how to use frontend.
Enabling frontend also adds support for dCacheView, a modern client that uses a web-browser’s JavaScript and frontend’s REST API.
Supporting anonymous FTP access
Before HTTP was widely used, FTP was a standard protocol for handling files. It is still used (in some cases) for transferring data.
Anonymous FTP is a regular FTP server with username and password authentication, but with the convention that if the username is anonymous then the user is allowed limited access. As a courtesy, the password should be the user’s email address, although many clients do not honour this.
With some user-communities, anonymous FTP is often used to make data publicly available.
Let’s add anonymous FTP support to dCache. To do this, we add another service to the layout file:
[doorsDomain]
[doorsDomain/webdav]
 webdav.loginbroker.port = 8080
 webdav.cell.name = WebDAV-U-${host.name}

[doorsDomain/webdav]
 webdav.loginbroker.port = 8443
 webdav.authn.protocol = https
 webdav.cell.name = WebDAV-S-${host.name}

[doorsDomain/frontend]

[doorsDomain/ftp]
 ftp.enable.anonymous-ftp = true
 ftp.enable.username-password = false
 ftp.anonymous-ftp.root = /public
This adds an anonymous FTP server listening on port 22126. The connections are unencrypted, so we have disabled username and password support.
We also might want to control exactly which data is available via anonymous FTP. By default, the anonymous user can list directories and read data that are world-readable. ACLs would allow finer-grain control on what anonymous users can see and do; however, a simpler approach is to designate a specific directory as the anonymous-FTP root. With the above configuration, the anoymous FTP user would see the directory /public as their root directory and the directory /public/data would appear as /data to the anonymous-FTP client. Any data that should be exposed would be moved within the /public directory.
We also need to create the /public directory:
chimera
|Jul 19, 2019 4:29:17 PM com.hazelcast.config.XmlConfigLocator
|INFO: Loading 'hazelcast.xml' from classpath.
|WARN  - [131.169.240.59]:5701 [dcache-namespace] [3.11.1] No join method is enabled! Starting standalone.
|Type 'help' for help on commands.
|Type 'exit' or Ctrl+D to exit.
|chimera:/# mkdir /public
|chimera:/# mkdir /public/tester
|chimera:/# chown 1000:1000 /public/tester
|chimera:/# ls /public
|total 3
|drwxr-xr-x 3    0    0 512 Jul 19 16:29 .
|drwxrwxrwx 4    0    0 512 Jul 19 16:29 ..
|drwxr-xr-x 2 1000 1000 512 Jul 19 16:29 tester
|chimera:/# exit
In this simple example, the tester user can upload files into the /public/tester directory and an anonymous FTP client can access those files.
As above, we must restart the doorsDomain so that dCache will accept FTP clients:
dcache restart doorsDomain
|Stopping doorsDomain 0 done
|Starting doorsDomain done
As the tester user, we can upload some test data into the /public/tester directory:
curl -u tester:TooManySecrets -L -T /bin/bash http://localhost:2880/public/tester/test-1.dat
|964544 bytes uploaded
curl -u tester:TooManySecrets -L -T /bin/bash http://localhost:2880/public/tester/test-2.dat
|964544 bytes uploaded
Downloading files using FileZilla
These files are now available through anonymous FTP. To show this, let’s configure the popular FileZilla FTP client:
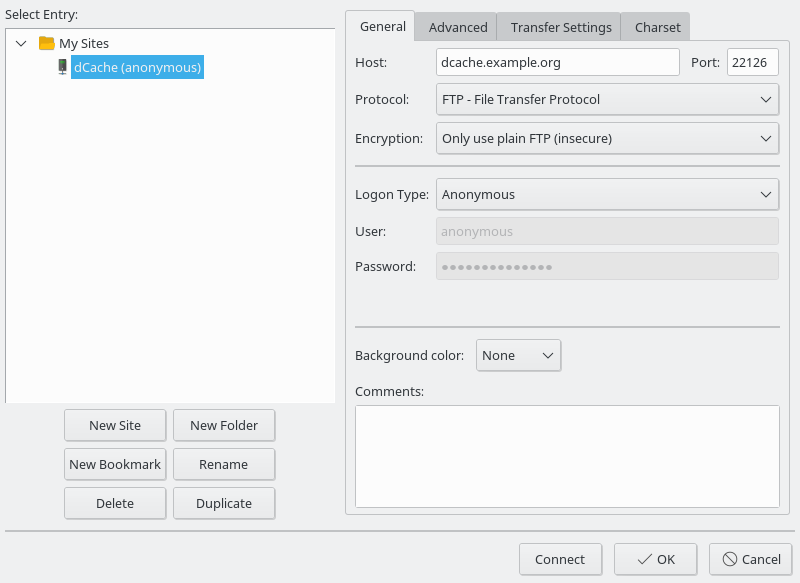
With this configuration, you can access public data stored the /public portion of dCache namespace. In the following example, the FileZilla client is showing the two test files (test-1.dat and test-2.dat) uploaded by user tester into the /public/tester directory. Note that, because the anonymous-FTP door is configured to have /public as its root directory, FileZilla shows the path as /tester instead of /public/tester.
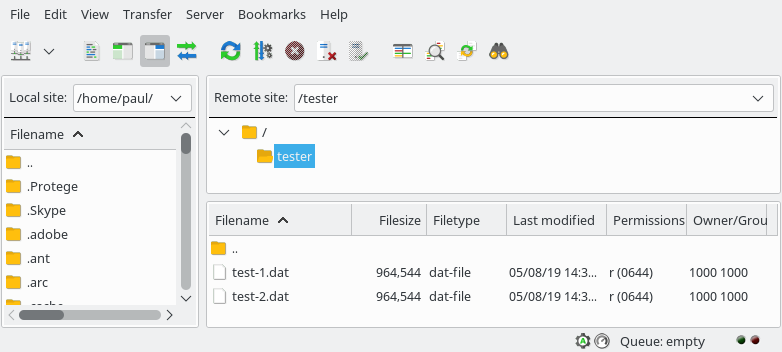
These files may now by downloaded by the client.
Public repositories for Globus
The Globus service allows people to manage scientific repositories and transfer data. It also allows sites to host public repositories, which are accessible via anonymous FTP. Therefore, a dCache instance that makes data available via anonymous FTP may be registered in Globus to allow easy access to datasets.
Supporting FTPS access
FTPS is the FTP protocol but using TLS to encrypt the control channel. It is widely supported by clients as a more secure variant of plain FTP.
Note there is another way to secure FTP communication commonly called GridFTP or gsiFTP. Although dCache also supports this protocol, we will defer adding support until the next step, as most clients only support X.509 for client authentication.
To add FTPS support, we add an additional ftp service to the doorsDomain:
[doorsDomain]
[doorsDomain/webdav]
 webdav.loginbroker.port = 8080
 webdav.cell.name = WebDAV-U-${host.name}

[doorsDomain/webdav]
 webdav.loginbroker.port = 8443
 webdav.authn.protocol = https
 webdav.cell.name = WebDAV-S-${host.name}

[doorsDomain/frontend]

[doorsDomain/ftp]
 ftp.enable.anonymous-ftp = true
 ftp.enable.username-password = false
 ftp.anonymous-ftp.root = /public

[doorsDomain/ftp]
 ftp.authn.protocol=tls
 ftp.enable.anonymous-ftp = true
 ftp.anonymous-ftp.root = /public
This enables an FTP server listening on port 22130 that accepts FTPS clients. Both regular (authenticating with username and password) and anonymous-FTP users can use this endpoint, with anonymous FTP users
As above, we must restart the doorsDomain so that dCache will start the new service:
dcache restart doorsDomain
|Stopping doorsDomain 0 done
|Starting doorsDomain done
Clients, such as FileZilla, can now access dCache securely using username and password authentication.
Supporting NFS access
The NFS protocol was been around for considerable time and has evolved considerably over that time. NFS v3 saw various limits associated with file size lifted; NFS v4 brought various performance benefits; NFS v4.1 included the pNFS extension that allows scalable IO.
Although dCache supports NFS v3 (namespace only) and NFS v4 clients, the most common deployment is with NFS v4.1 with pNFS enabled.
To enable NFS support, update the layout file, so the doorsDomain has the following definition:
[doorsDomain]
[doorsDomain/webdav]
 webdav.loginbroker.port = 8080
 webdav.cell.name = WebDAV-U-${host.name}

[doorsDomain/webdav]
 webdav.loginbroker.port = 8443
 webdav.authn.protocol = https
 webdav.cell.name = WebDAV-S-${host.name}

[doorsDomain/frontend]

[doorsDomain/ftp]
 ftp.enable.anonymous-ftp = true
 ftp.enable.username-password = false
 ftp.anonymous-ftp.root = /public

[doorsDomain/ftp]
 ftp.authn.protocol=tls
 ftp.enable.anonymous-ftp = true
 ftp.anonymous-ftp.root = /public

[doorsDomain/nfs]
 nfs.version = 4.1
We need to configure the NFS door to say which client hosts are allowed to connect, and what they are authorised to see and do. By default, NFS servers use the /etc/exports file and /etc/exports.d directory.
Let’s create the file /etc/exports that says the server running dCache is able to NFS mount dCache’s root directory and has complete access. This is represented by the following contents:
/ localhost (rw)
As above, the doorsDomain is restarted to support this new service:
dcache restart doorsDomain
|Stopping doorsDomain 0 1 done
|Starting doorsDomain done
Your dCache instance is now running an NFS server that supports NFS v4/v4.1 clients.
To mount dCache, simply run the mount command. We’ll create a directory /dcache as the target directory.
mkdir /dcache
mount localhost:/ /dcache
With dCache NFS mounted, all of dCache appears as a regular filesystem within the client machine. Standard namespace commands, such as ls, mv and rm work as expected. Files may also be created and delete using your favourite application.
ls /dcache
|home  lost+found  public
ls -ln /dcache
|total 2
|drwxr-xr-x. 4 0 0 512 Jul 19 21:32 home
|drwx------. 2 0 0 512 Jul 19 21:29 lost+found
|drwxr-xr-x. 3 0 0 512 Aug  5 12:26 public
ls -ln /dcache/public
|total 1
|drwxr-xr-x. 4 1000 1000 512 Aug  5 12:38 tester
ls -ln /dcache/public/tester
|total 1884
|-rw-r--r--. 1 1000 1000 964544 Aug  5 12:38 test-1.dat
|-rw-r--r--. 1 1000 1000 964544 Aug  5 12:38 test-2.dat
Different users
In general, dCache users and the machine’s local users are completely independent. In dCache, we assigned user
testeruid 1000; however, the local machine could have assigned that number to any account. There are various strategies to keep the identities in sync. However, describing them is beyond the scope of this chapter.
Supporting xroot access
xroot is a proprietary protocol mostly used within the particle physics community. To enable support, update the layout file to include an xrootd service:
[doorsDomain]
[doorsDomain/webdav]
 webdav.loginbroker.port = 8080
 webdav.cell.name = WebDAV-U-${host.name}

[doorsDomain/webdav]
 webdav.loginbroker.port = 8443
 webdav.authn.protocol = https
 webdav.cell.name = WebDAV-S-${host.name}

[doorsDomain/frontend]

[doorsDomain/ftp]
 ftp.enable.anonymous-ftp = true
 ftp.enable.username-password = false
 ftp.anonymous-ftp.root = /public

[doorsDomain/ftp]
 ftp.authn.protocol=tls
 ftp.enable.anonymous-ftp = true
 ftp.anonymous-ftp.root = /public

[doorsDomain/nfs]
 nfs.version = 4.1

[doorsDomain/xrootd]
As usual, we restart doorsDomain to ensure the xroot endpoint is started:
dcache restart doorsDomain
|Stopping doorsDomain 0 done
|Starting doorsDomain done
The xroot clients can now interact with dCache.
xrdfs root://dcache.example.org
|[dcache.example.org:1094] / > ls -l
|dr-x 2019-07-19 21:32:04         512 /home
|d--- 2019-07-19 21:29:30         512 /lost+found
|dr-x 2019-08-05 12:26:28         512 /public
|[dcache.example.org:1094] / > cd /public/tester
|[dcache.example.org:1094] /public/tester > ls -l
|-r-- 2019-08-05 12:38:53      964544 /public/tester/test-1.dat
|-r-- 2019-08-05 12:38:57      964544 /public/tester/test-2.dat
|[dcache.example.org:1094] /public/tester > exit
|Goodbye.
Other protocols
In this install step, we have enabled support for several network protocols. There are several we have skipped over, because they are mostly concerned with clients that authenticate themselves with X.509 (instead of username and password).
We will add support once dCache is updated to support X.509 client authentication.
Step 5. Enabling more authentication options
Although username and password is fairly ubiquitous in computing (everyone is familiar with the idea) typing in a password for each transfer session is often quite annoying for users. Some client software allow users to store their password, which makes this authentication scheme more usable. Storing passwords is often problematic and increases the likelihood of the password being stolen.
In this section we will enable two alternative approaches: X.509 and OpenID-Connect.
Supporting X.509 client authentication
Although less commonly deployed than host X.509 authentication, client X.509 authentication allows users to identify themselves without having to specify a username and password.
The first step when adding X.509 client authentication is to decide which certificate authorities to trust. For scientific research groups, the IGTF trust bundle is a common choice.
To do this, create the file EGI-trustanchors.repo in the /etc/yum.repos.d directory with the following content:
[EGI-trustanchors]
name=EGI-trustanchors
baseurl=http://repository.egi.eu/sw/production/cas/1/current/
gpgkey=http://repository.egi.eu/sw/production/cas/1/GPG-KEY-EUGridPMA-RPM-3
gpgcheck=1
enabled=1
Then, to install the standard set of repos, run:
yum install ca-policy-egi-core
|Loaded plugins: fastestmirror
|Loading mirror speeds from cached hostfile
|[...]
|  ca_policy_igtf-classic.noarch 0:1.101-1
|  ca_policy_igtf-mics.noarch 0:1.101-1
|  ca_policy_igtf-slcs.noarch 0:1.101-1
|  ca_seegrid-ca-2013.noarch 0:1.101-1
|
|Complete!
This will result in a large number of certificate authorities installed in the /etc/grid-security/certificates directory.
Next, we need to update gPlazma configuration to extract the distinguished name (DN) from the X.509 certificate issued by one of the trusted CAs.
To do this, update the /etc/dcache/glazma.conf file, adding the line auth optional x509. The resulting file should look like
auth    optional  htpasswd
auth    optional  x509
map     optional  multimap
session requisite authzdb
Finally, we add the DN of the user as a new mapping in /etc/dcache/multi-mapfile. The file should now look like:
"dn:/C=DE/O=GermanGrid/OU=DESY/CN=Alexander Paul Millar" username:tester

username:tester uid:1000 gid:1000,true
username:admin uid:0 gid:0,true
Where the actual distinguished name of the user is added.
With these changes, clients are now able to upload files using the X.509 identity.
Groups and VOs
In practise, X.509 is often used with the VOMS extension which describes group membership. It is possible to configure dCache to map VOMS group membership into corresponding gid values, and to assign a default user for otherwise unknown members of a VO.
Supporting OpenID-Connect
OpenID-Connect (OIDC) is a distributed authentication scheme where the client presents a bearer token when authenticating. There are many OIDC providers (OPs), both commercially (e.g., Google) and scientific community services (e.g., EGI CheckIn service), and software intended for scientific communities (e.g., INDIGO IAM, UNITY).
dCache supports all these, included multiple OPs concurrently.
For example, to add support for Google, add gplazma.oidc.provider!google = https://accounts.google.com/ to the layout file, under the gplazma service:
[centralDomain/gplazma]
 gplazma.oidc.provider!google = https://accounts.google.com/
Update the /etc/dcache/gplazma.conf file so that the oidc plugin is enabled in the auth phase:
auth    optional  htpasswd
auth    optional  x509
aut     optional  oidc
map     optional  multimap
session requisite authzdb
Finally, add the user’s oidc subject (the sub claim) into the /etc/dcache/multi-mapfile file; e.g,.
"dn:/C=DE/O=GermanGrid/OU=DESY/CN=Alexander Paul Millar" username:tester
oidc:102436044328049007513 username:tester

username:tester uid:1000 gid:1000,true
username:admin uid:0 gid:0,true
Users can now be able to use an access token to make WebDAV requests in dCache.
Step 6. Moving to a multi-host deployment
Earlier, we created three separate domains: doorsDomain, poolsDomain, centralDomain with the purpose of not having to restart all of dCache. In this step, we take this idea a little further by moving these domains to separate machines.
To do this, you will need three machines. Install dCache on these three machines and copy a portion of the layout file to each machine.
On the central node, the layout file should read:
[centralDomain]
 dcache.broker.scheme = core
[centralDomain/zookeeper]
[centralDomain/admin]
[centralDomain/pnfsmanager]
 pnfsmanager.default-retention-policy = REPLICA
 pnfsmanager.default-access-latency = ONLINE

[centralDomain/cleaner]
[centralDomain/poolmanager]
[centralDomain/billing]
[centralDomain/gplazma]
 gplazma.oidc.provider!google = https://accounts.google.com/
On the door node, the layout file should read:
dcache.zookeeper.connection = central-node.example.org:2181

[doorsDomain]
[doorsDomain/webdav]
 webdav.loginbroker.port = 8080
 webdav.cell.name = WebDAV-U-${host.name}

[doorsDomain/webdav]
 webdav.loginbroker.port = 8443
 webdav.authn.protocol = https
 webdav.cell.name = WebDAV-S-${host.name}

[doorsDomain/frontend]

[doorsDomain/ftp]
 ftp.enable.anonymous-ftp = true
 ftp.enable.username-password = false
 ftp.anonymous-ftp.root = /public

[doorsDomain/ftp]
 ftp.authn.protocol=tls
 ftp.enable.anonymous-ftp = true
 ftp.anonymous-ftp.root = /public

[doorsDomain/nfs]
 nfs.version = 4.1

[doorsDomain/xrootd]
The dcache.zookeeper.connection configuration is so that dCache running on the doors node knows how to contact the embedded zookeeper server running within the central node.
On the pool node, create new pools. You can use the pool’s migration move command to move the file replicas from the existing pool to the new pool.
This deployment should scale to match demand:
- multiple door nodes allows for more concurrent access,
- services in the core node may be split over multiple machines,
- additional capacity is avilable by creating more pool nodes.
Step 7. High-availability dCache
Highly available dCache is intended to be fault tolerant, allowing the dCache service to continue even if a node goes down. To achieve this, we must add redundancy at different levels.
Zookeeper
First, the zookeeper instance is a single point-of-failure: if the central node hosting the zookeeper service dies then dCache will not be able to maintain its consistency.
To avoid this problem, remove the embedded zookeeper instance and create a “zookeeper ensemble”: a cluster of three or more zookeeper servers run outside of dCache. You can configure the dcache.zookeeper.connection property to specify the hostnames to which dCache should connect.
Cell communication
Next, the internal dCache communication must be made redundant. If the single core domain where to stop then services in one domain will not be able to send messages to services in another domain.
To solve this problem, have multiple core domains. If a core domain goes down then dCache will start routing messages through the other core domains.
Services
For doors, the solution is simple: have multiple door nodes so that any protocol is supported on at least two nodes. You can use a load-balancer to match clients to servers (either commercial or open-source, such as HA-proxy).
Most central services allow for multiple instances within the dCache cluster. For details, see the service-specifc documentation.
Finally pools tend not to be directly highly available. It is possible to run dCache with resilience configured, so that files are present on multiple pools. If a file’s data is present on multiple pools then dCache will select the least busy strategy and select the corresponding pool for transfers.
Step 8. Upgrading dCache
As a dCache admin, there are two kinds of upgrade available to you: bug-fix releases and major releases.
Upgrading to a new bug-fix version
A bug-fix upgrade is where the final of the three numbers making up a dCache version increases; for example, from 7.1.32 to 7.1.33. There are two key points to a bug-fix upgrade.
First (unless specified in the release notes) a bug-fix version is backwards compatible with all other bug-fix versions from the same release. This means you can mix-and-match dCache bug-fix versions within you dCache cluster and everything will work fine; e.g., a cluster can contain nodes running 7.1.0, nodes running 7.1.1 and nodes running 7.1.2, and there are no compatibility issues.
As a concrete example, suppose there is a bug that affects only the WebDAV door that is fixed in the latest bug-fix version of dCache. You can upgrade those machines running a WebDAV door to the fixed version of dCache while leaving all the other nodes unchanged. This minimises the impact of the upgrade.
Second, bug-fix releases fix only bugs. Any changes to code involves a certain element of risk: is the new version going to work as expected? By limiting bug-fix releases to just fixing bugs, we try to reduce that risk to a minimum. You should feel comfortable that, after installing a new bug-fix release, dCache will continue to work fine.
A bug-fix upgrade is generally pretty straightforward: just upgrade the package (e.g., RPM package). The rpm command will automatically stop any running dCache domains before starting the upgrade process. The only thing to remember is to start dCache after the upgrade completes.
rpm -Uvh dcache-7.1.33-1.noarch.rpm
|Preparing...                          ################################# [100%]
|Updating...
|   1:dcache-7.1.33-1                   ################################# [100%]
dcache start
|Starting centralDomain done
|Starting doorsDomain done
|Starting poolsDomain done
This assumes that you have copied the download URL from already downloaded the file dcache-7.1.33-1.noarch.rpm from dCache’s website.
However, you do not need to do this, as you can specify the URL instead; e.g.,
rpm -Uvh https://www.dcache.org/downloads/1.9/repo/7.1/dcache-7.1.33-1.noarch.rpm
|Retrieving https://www.dcache.org/downloads/1.9/repo/7.1/dcache-7.1.33-1.noarch.rpm
|Preparing...                          ################################# [100%]
|Updating / installing...
|   1:dcache-7.1.33-1                   ################################# [100%]
dcache start
|Starting centralDomain done
|Starting doorsDomain done
|Starting poolsDomain done
Upgrading to a new major releases
Periodically, dCache creates a new dCache release from the current “bleeding edge” development version of dCache. The initial version of this release has a version number ending .0; e.g., 7.1.0.
Motivation
A new release will very likely have many new features compared to the previous release. Those new features will likely bring benefits to yourself (as an admin) and to your users, although it will likely require good communication between admins and the dCache users to communicate these improvements, allowing users to maximise the benefit from upgrading.
Note that, since the dCache team operate on a time-boxed release strategy, the release schedule depends mostly on the calendar. This means we don’t delay a release to include specific features, and so we cannot guarantee what features will be available until after the release is made.
The other major benefit for upgrading is support; in particular, that you can continue receiving bug-fix releases.
Any release will have a designated support period, which is shown at the top of the dCache download page. During this support period, the dCache team will release new dCache versions that fix bugs. A version number ending with a non-zero value indicates a bug-fix release; for example, 7.1.1 is the first bug-fix version of the 7.1 release.
Once the support period elapses, there are no more bug-fix versions. This includes any security fixes. Therefore, as an admin, you are encouraged to upgrade your dCache instance a comfortable period before the support period ends. That way, you will always be able to upgrade your dCache instance, should you be suffering from a bug.
Each year, one major release is the new “golden” dCache release. This is the major release with the longest support period, but is otherwise just like another major dCache release.
In general, dCache major releases may contain non-backwards compatible changes: you cannot mix different releases within the same dCache cluster. There is a specific exception: nodes that run only the pool service (“pool nodes”) may run an older release of dCache, provided the pool nodes are not older than the previous golden release.
This allows a site to upgrade the non-pool nodes in one go, start dCache, and (without stopping dCache) upgrade the pool nodes one-by-one to that new release. This feature is particularly useful in distributed deployments, where simultaneously upgrading all nodes might prove difficult.
Choosing the upgrade target version
Many sites choose to keep their storage using golden versions of dCache. The release schedule for dCache major releases is chosen so that such such dCache instances need to upgrade once per 12-month period (from summer to the following summer), but the site can choose when within those 12 months to do the upgrade.
Some sites deploy non-golden dCache releases. The support period for non-golden dCache releases is chosen so the period ends at the same time as the previous golden release. In other words, a site does not loose any support period when upgrading from a golden release to an subsequent major release.
Often, a site is not free to choose when an upgrade takes place. External constraints, often from the users of that dCache instance, dictate when an upgrade is possible. In such circumstances, we would recommend taking the latest release of dCache.
You can upgrade directly from any release of dCache to any (newer) release of dCache.
We include various safety measures that help identify common problems when upgrading, particularly when a configuration property name has changed. These measures work best when the upgrade breadth (the series the upgrade is starting from, to the series the upgrade targets) is not larger than golden release to golden release; for example, upgrading from dCache v4.2 to dCache v5.2 (both golden releases) is fine, but an upgrade from dCache v4.0 to dCache v6.0 would involve fewer safeguards.
A direct upgrade from v4.0 to v6.0 is still possible, but it may be prudent to test the upgrade, by first testing the upgrade from v4.0 to v5.0, run the dcache check-config command, fixing any issues, upgrading from v5.0 to v6.0, running the dcache check-config command again, and fixing any issues found. The resulting configuration may be used when upgrading the production instance from v4.0 to v6.0.
However, it is recommended to upgrade often enough that such half-step upgrades are not needed.
Upgrade procedure
When upgrading a dCache instance, you should first test the upgrade procedure on a test instance that has comparable complexity. In particular, if the upgrade involves database schema changes then you should identify how long those schema changes will take. Simply applying an upgrade to a production instance without first testing it risks extended downtimes as you frantically chaise problems.
dCache configuration evolves over time. We try to keep the options backwards compatible with previous versions of dCache, but that compatibility is limited. In particular, the dcache check-config command lists configuration properties that have been deprecated in favour of some new property. Run this command on the test upgrade to ensure you have made all the necessary changes.
When upgrading the production instance, you should stop all dCache nodes, upgrade the dCache RPM on all nodes, run any database schema changes, upgrade the configuration, and start dCache.
Next steps
Now that you have install dCache and learnt about upgrading, you may choose to learn more about dCache.